OVERVIEW (Purpose)
Click here for the PDF version of this manual
The Family Educational Rights and Privacy Act (FERPA) protects the privacy of a student’s education record, which includes access to student information of course sections they are not enrolled in. This means that students should not be able to identify students in other course sections, unless they physically meet in the same classroom at the same time. When different course sections are merged in Canvas, students may be able to see other students who are enrolled in a different section. Therefore, merging class sections in Canvas can violate students’ right to privacy by sharing protected information.
In order to continue to provide faculty the option of merging their courses, NIC has created guidelines on how to make a merged course FERPA compliant.

Global & Course Level Settings Modifications
For security reasons, several Settings have been modified at the administration and course levels of Canvas:
- The Chat function has been disabled in all Canvas courses.
- Students are prevented from creating Discussions in the Course Discussions Page
- Student access to the People tab has been turned off.
- The Conferences tool is hidden from the course navigation menu
- Students have been restricted to be able to only view and interact with students in their own section.
When students are limited to be able to only view and interact with students in their own sections students cannot:
- Invite Students from other Sections into Conferences using the Conference Tool
- See the Canvas Profile of other users, including their instructor’s.
- Send messages to students not in their section through the Canvas Inbox.
Canvas Inbox
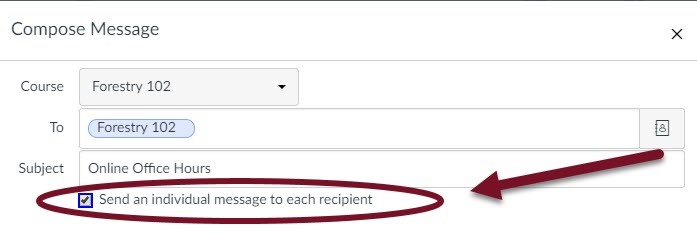
Although students cannot directly message students in sections outside of their own, if an instructor sends a message to all students in the course, students are able to Reply-All and send messages to all students, even those outside their section. In order to prevent this, instructors are required to ensure that all messages sent to students using the Canvas Inbox do not allow students to view recipients not in their section. When composing a message to all students in the course at once you must check the box that says “Send an individual message to each recipient.” This will prevent students from seeing the names of other students who also received the message, and prevent them from being able to Reply-All.
FERPA Guidelines for Optional Course Tools
These guidelines apply only for the following course tools: Discussions, Collaborations, Group Assignments, Peer Reviews, and Conferences.
Groups
Instructors can create separate Groups for each section in a merged course to prevent interactions between students. Once section Groups have been created, they can be utilized in Discussions, Collaborations, and Group Assignments.
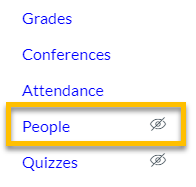
1. Click on People in the Course Navigation Menu. The link may be disabled for students, but is still accessible.
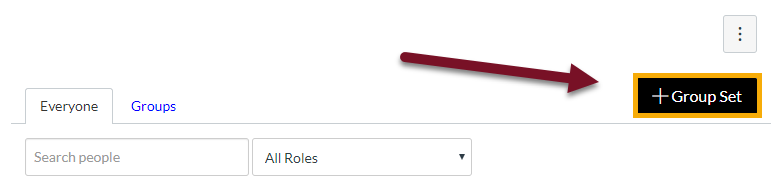
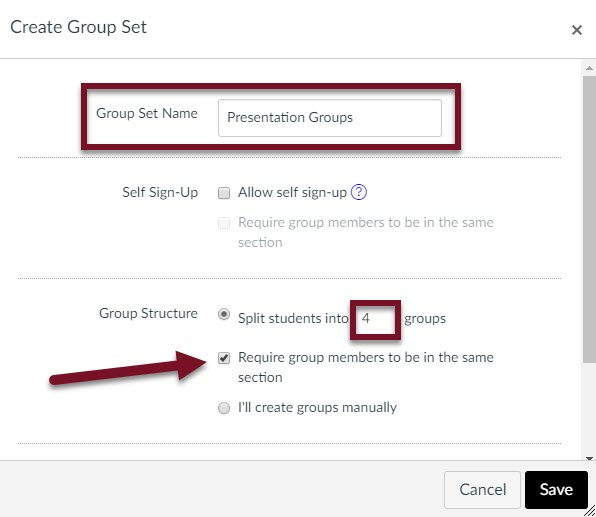
2. Create a Group Set by clicking the + Group Set button on the right side of the People page.
3. In the Create Group Set box, create a Group Set Name. Since Students see all of their groups from all their courses in one Groups tab in Canvas it is important to include both a section and course name in the group title to prevent confusion or overlap (i.e. a student being in “Group 1” in two different courses and being unsure which Group 1 is for which course).
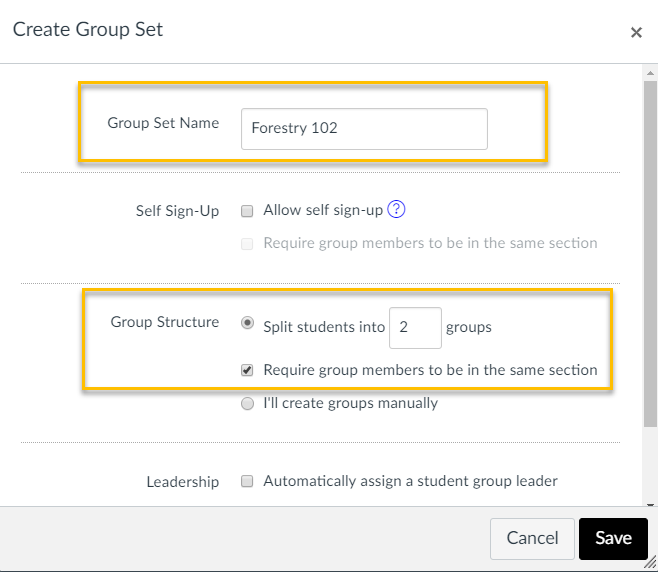
4. Under Group Structure, enter the number of groups you will need to create. If you have two sections merged, you’ll split students into two groups, three sections, three groups, etc. Use the “Require group members to be in the same section” option to have Canvas automatically sort students to groups by section, then click Save to create your groups.

Discussions
Despite limiting students to only be able to view and interact with students in their own section, when an instructor creates a Discussion in the main Discussion area in the course, students will be able to see the other students who reply to that discussion, even if they are in other sections. Instructors have two options to create discussions that will be viewable to only students within one section.
Option 1: The instructor may create separate discussions for each section, which will create a separate assignment and differentiated assignment columns in the gradebook.
Option 2: The instructor can create a discussion assigned to groups, which will create a single assignment, and a single assignment column in the gradebook.

Instructions for Option 1
To create a separate discussion for each section, you will create two separate Graded Discussions on the main Discussion page, use the Duplicate function to Duplicate the discussion, and then assign the duplicated discussion to a different section. This will create two separate assignments that are differentiated assignments in the gradebook.
1.Use the + Discussion button on the Discussions page to create a new discussion post.

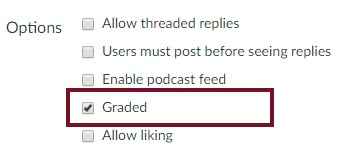
2.After you have created your Discussion prompt, check the “Graded” check box under Options to make it a graded assignment.
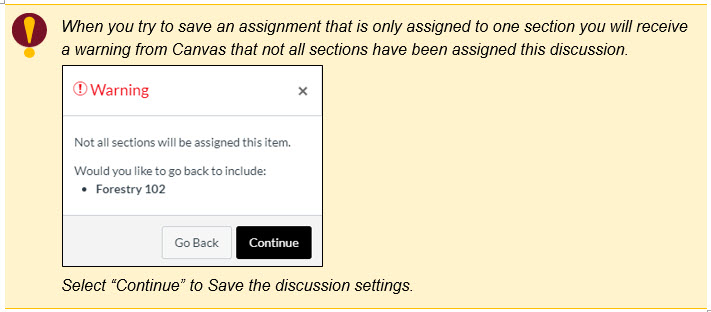
3.Assign the discussion to one Course Section, then select Save.
4. To create a duplicate discussion to assign to a different section, return to the Discussions page. Select the three-dot menu icon next to the Discussion post, then Duplicate.
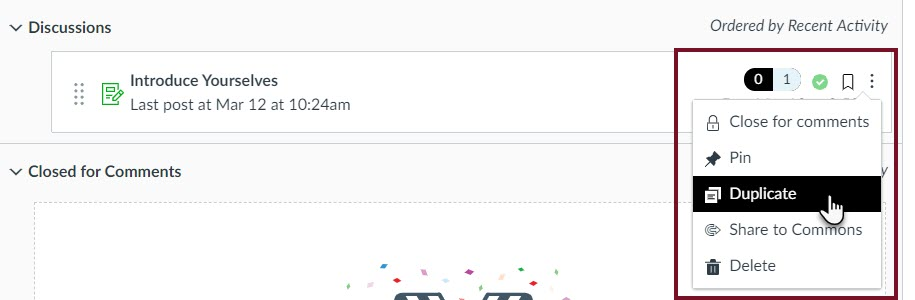
The duplicated discussion will appear on the Discussions page with “copy” appended to the name of the duplicated discussion title. It will be unpublished, and not assigned to any section.
5. Open the duplicated discussion, then select Edit to assign the discussion to a different course section.
6. Select Save.
Repeat Steps 4-6 until you’ve created a separate discussion for each section in the merged course.
Instructions for Option 2
For students, Group Discussions appear only in the Groups section of the course and not in the main Discussion area. However, you still create Group Discussions on the main Discussions page. To create a Group Discussion, you will first need to create your Groups as detailed earlier in this document, and then create a Graded Group Discussion.
1.Click on the Discussions link in the Course Navigation Menu.
2.Click the + Discussion button.

3.Check the “This is a Group Discussion” check box, then select your previously created Group Set.

Canvas will then create a separate Discussion for each group within the selected Group Set that students will be able to access by navigating to their Group Home Page in your course.
Conferences
Conferences in Canvas use a web conferencing platform called BigBlueButton, which contains a chat space for students to interact that cannot be disabled or restricted by section. Instructors who want to use Conferences in Merged Courses using BigBlueButton must invite each section to separate conferences by checking each individual student’s name within that course section during the conference creation. Additionally, due to the limitations of the software, more than one conference cannot be held concurrently (e.g. you cannot be in two conference rooms at the same time).
Collaborations
Collaborations use Google Docs or Office 365 to create collaborative documents editable by any student who has access to the course. Instructors who want to use Collaborations in Merged Courses must create separate collaborative documents for each section by using the Groups selection option. Collaborations require that Groups are set up prior to the creation of the collaborative document.
Group Assignments
When instructors create Group Assignments they can use previously created groups, create new Groups just for one assignment using the Group Assignment option when creating new Assignments.
1.Click on the Assignments link in the Course Navigation Menu to open the Assignments page.

2.Select the + Assignment button to add a new Assignment.


3.Check the “This is a Group Assignment” box, select New Group Category.

In the pop up window, name the Group Set, set the number of groups, and then check “Require group members to be in the same section.”
Peer Reviews
There is no way to assign Peer Reviews by groups or section. Therefore, instructors must check the “Peer Reviews Appear Anonymously” box, or use the “Manually Assign Peer Reviews,” making sure to not assign peer reviews to students not in the same section. Before deciding which option to use, Instructors should know that the Anonymous Peer Review option does not allow students to use the DocViewer to leave annotations on the document itself.
For more information, visit North Idaho College’s FERPA policy.
Zoom Settings for Merged Courses
FERPA law protects student privacy including information that may be given over Zoom such as the student’s name which normally would fall under “directory information” that is fine to share but in a merged course this also would elude to or reveal which section the student is in which DOES NOT fall under “directory information”. Therefore, it is necessary to follow the following recommendations when using Zoom in a merged course.
Hold a separate Zoom meeting for each section. Luckily, there is a relatively simple way to do this in Canvas. This process will start the same as mentioned earlier in this document by creating one Zoom meeting then, there will be some additional steps as outline below.
1. Follow the instructions for scheduling a Zoom meeting on pages 3-6 of the Zoom Integration Guide, IN ADDITION follow these steps:
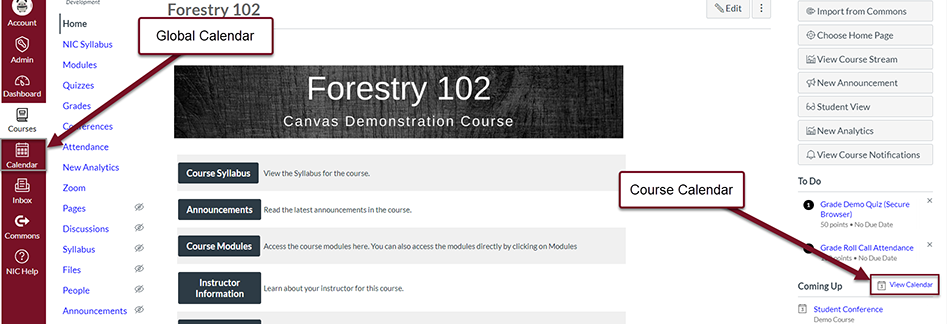
2. Click the Course Calendar (or the Global Calendar) link located on the course Home page.
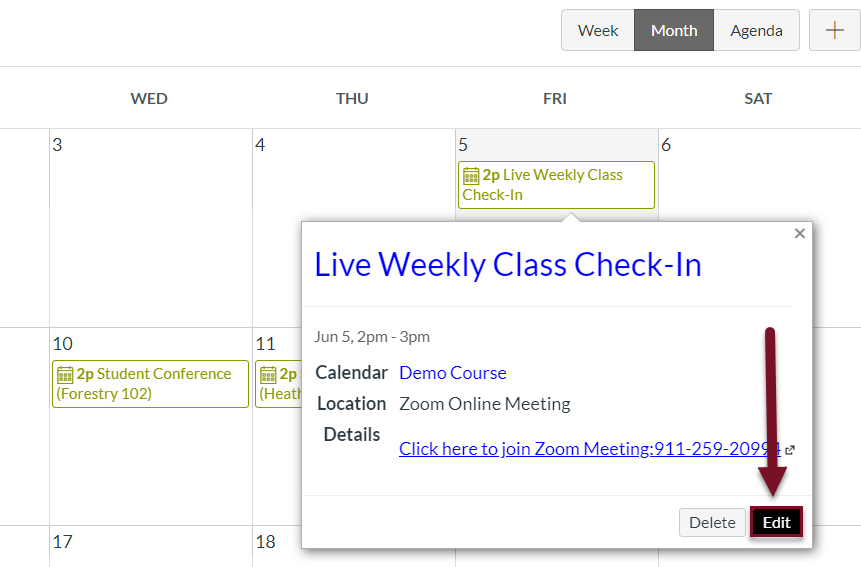
3. On the Calendar, locate the meeting you just created and click on it.

4. A pop-up will appear, click Edit.
5. A pop-up will appear, click More Options.
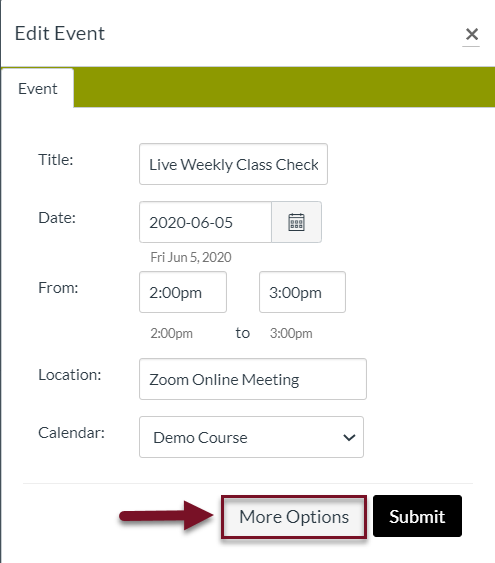
6. A new screen will appear. Check the box to “Use a different date for each section” and enter either a different date and/or time for each section in your course. (The meetings can be on the same day at a different time.)
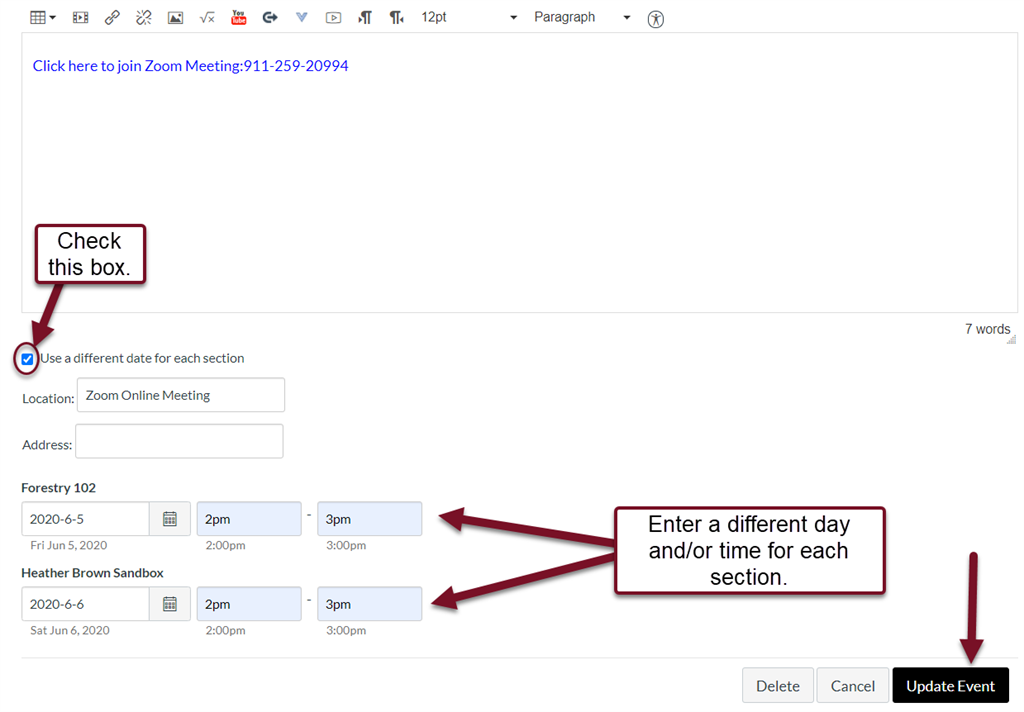
7.Click Update Event.
This process will create 2 (or more depending on how many sections are in the course) separate sessions with individual links for each section. It will also automatically place the students in the appropriate session. Students from Section 1 will NOT be able to join the session for Section 2 and vice versa. Students will only see their sections link on their calendar and to-do lists and will not see the other sections link. Make sure that these links are NOT shared in an all course announcement or email to all students in order to keep them secure.

Please refer to the IT Help Desk, Zoom Manual for instructions on how to set up a meeting with these tools. Please also refer to the IT Help Desk article, Zoom – Security Tips for how to ensure safety and security in a Zoom meeting.
Revised 6/8/2020